Activity: Pictures 🎨
Complete the setup to install the cImage module and read some key differences based on the latest updates to the module.
Create a file called line.py and save it to your cs100/ch6 folder.
- Copy the following code into your file:
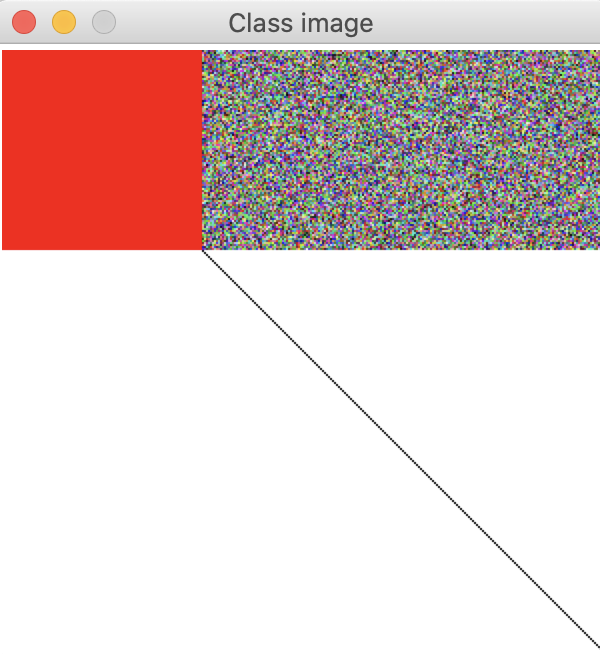
from image import * myWin = ImageWin(300, 300, "Class image") # create a new image which we modify img = EmptyImage(300,300) # diagonal pixels are colored black for i in range(300): # create a new pixel object with (red, green, blue) values blackPixel = Pixel(0,0,0) # note: setPixel(columnPosition, rowPosition, pixelObject) # set pixel at given columnPosition and rowPosition to be the color of pixelObject img.setPixel(i,i,blackPixel) # YOUR CODE HERE (change image before it is displayed & saved) # displays the image img.draw(myWin) # saves image to the given file name img.save("classImg.gif") # when you click anywhere on the window, it closes myWin.exitOnClick() -
Run the program. Inspect the code to understand what each line does.
-
Create a red square in the upper left corner which has width 100 pixels and height 100 pixels.
- Add a rectangle in the upper right corner which has width 200 pixels and height 100 pixels, where each pixel is a random color.
When you are finished, your program should produce the following output:
If you finish early
-
Add more shapes to your new image. What else can you create? A triangle? Maybe a tree with leaves on it? A house? A smiley face?
-
Work on your final project with your group.
How to submit
Submit your working line.py file to Moodle.