MySQL and MySQL Workbench
Windows Instructions
Make sure that you have already installed Python 3.9 BEFORE attempting to install MySQL. See the Python 3.9 Installation instructions to install that dependency.
Download
Visit the MySQL Download Page. Make sure to download the version 8 installer with the largest file size.
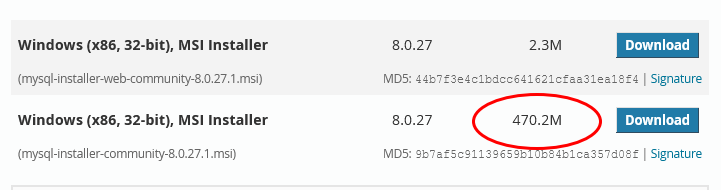
When you select download, the next screen will ask you to make an account. You DO NOT need to do this. Look for a link that says “No thanks, just start my download” and click that instead.
Installation and Configuration
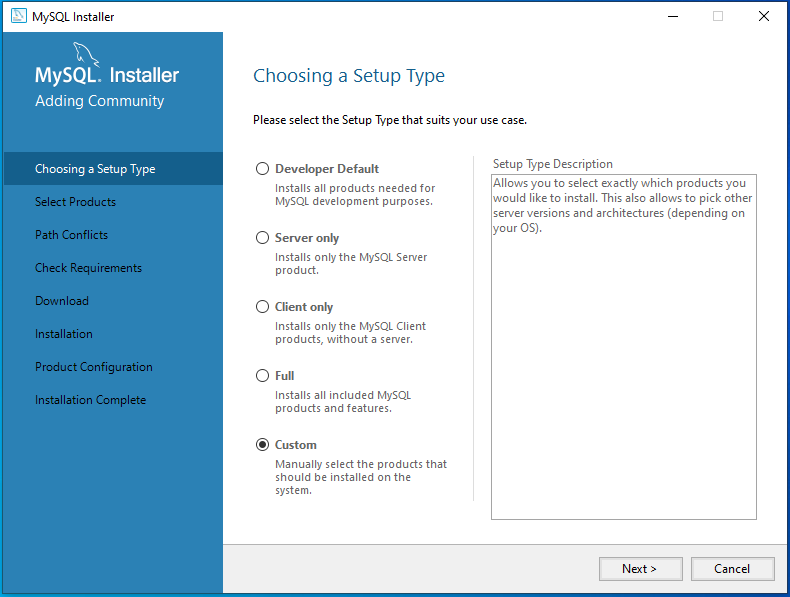
Find the installer you downloaded and, double click the installer to begin installation. When prompted with the type of install you’d like to perform, choose custom and hit next.
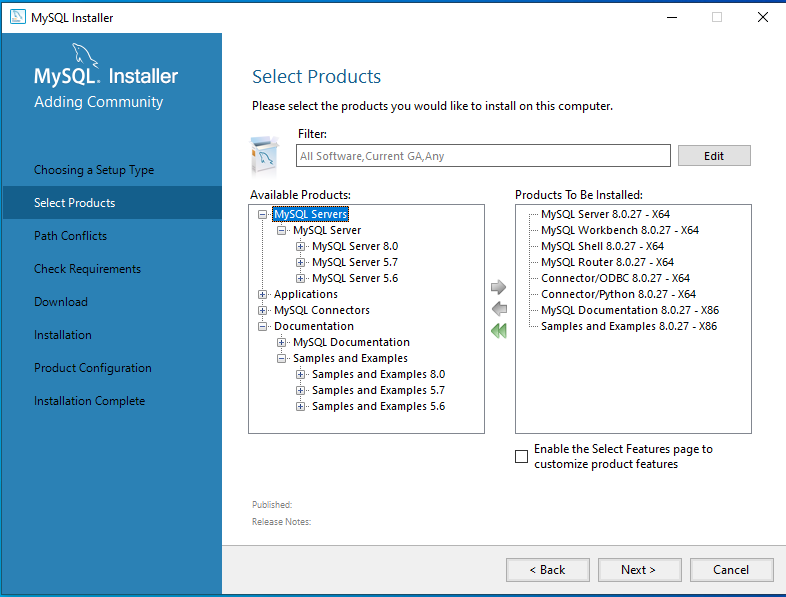
The next screen will show the default packages selected for installation. You will want to make sure that your selected packages match the ones shown in the image below. To remove extra options, just select them and then choose the arrow that points to the left side of the window. Due to a slight bug in the UI, you might have to click off and then back onto an item to activate the left arrow to remove the option.
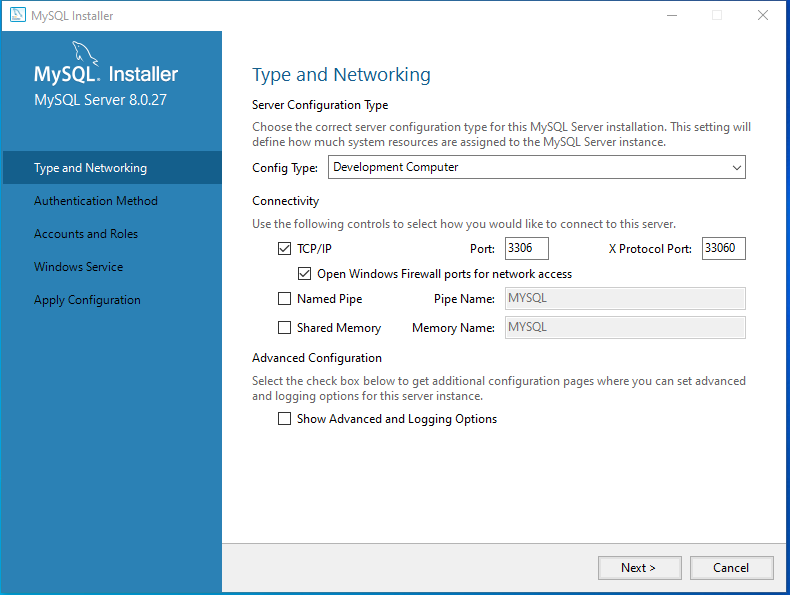
You will be asked what kind of MySQL setup you would like. We want to make sure we have a development setup.
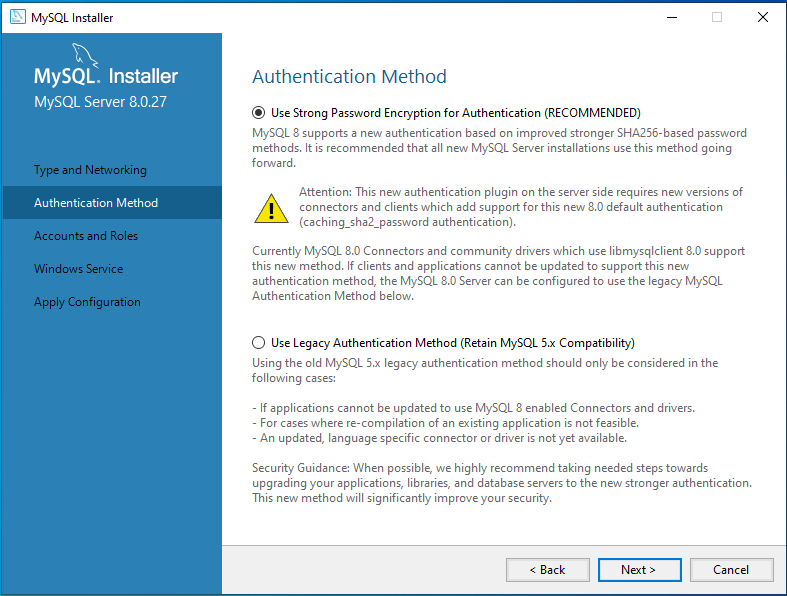
For the Authentication Method, we will use Strong Password Encryption.
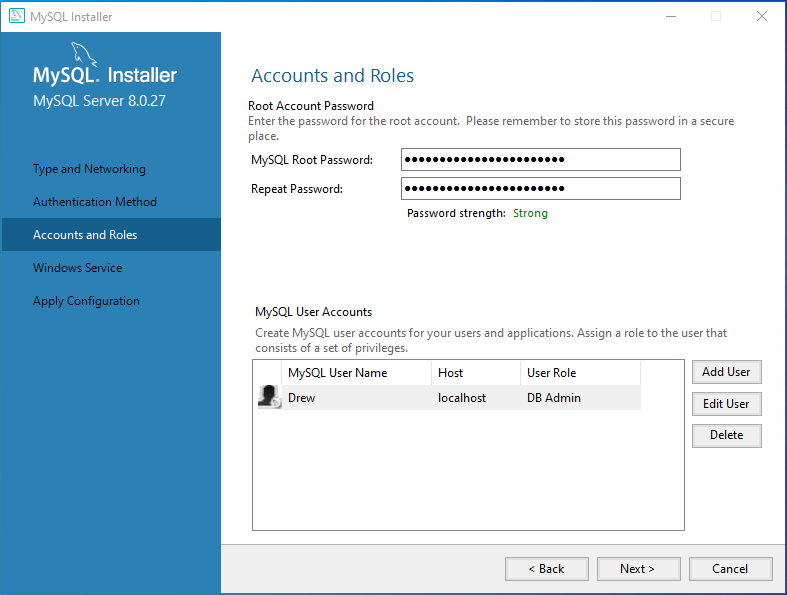
When setting up an Account, at the top of the screen you will first set your Root password. Make sure to WRITE THIS DOWN. Next you will use the bottom half of the screen to create a new MySQL User Account. To do this you will hit the Add User button and use the new window that pops up to provide a username (ideally, the same name as your user account for Windows), make sure to select the localhost host option, and then make your user a DB Admin as the role. Make sure that the password you create for your user is something you will remember or have written down.
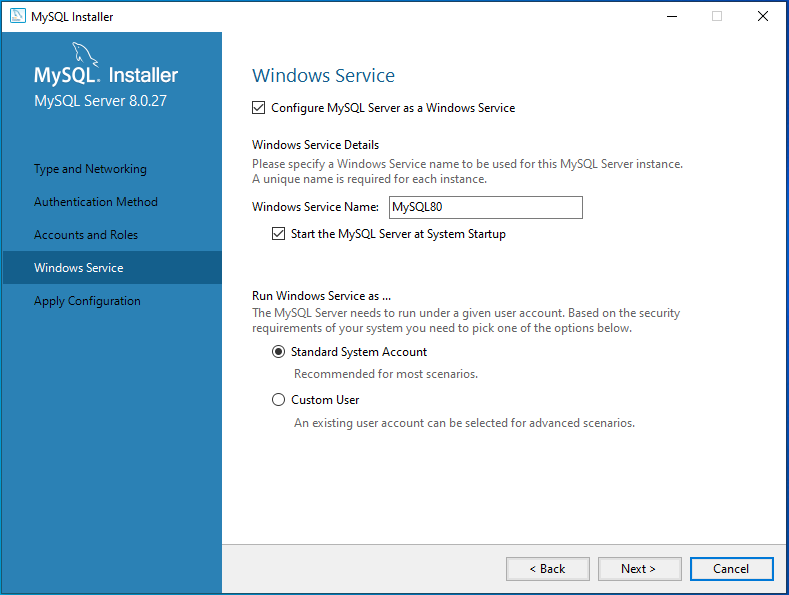
On the next screen the default options should be sufficient for the Windows Service setup. You can see the options I used below.
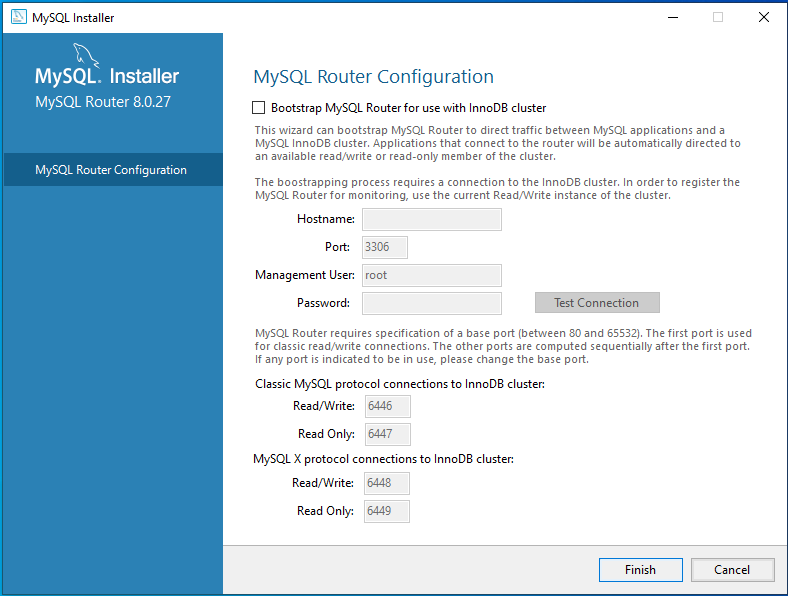
The screen to configure the MySQL Router should have sufficient defaults and we will most likely not utilize this features. You can see my settings below.
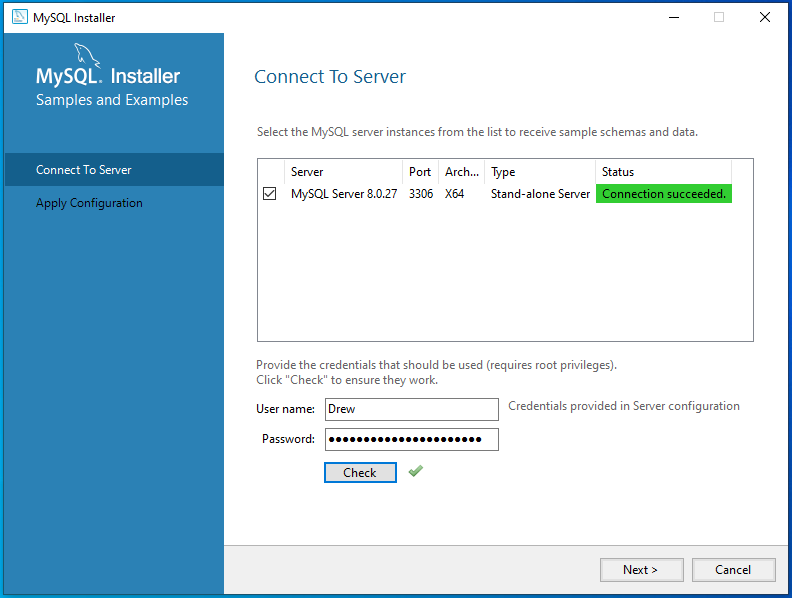
On the last screen you can check to verify that you can successfully connect to your database with the user account you setup earlier.
You should be able to “Next” your way through the last step(s) and finish the installation.
macOS Instructions
Make sure that you have already installed Homebrew and Python 3.9 BEFORE attempting to install MySQL. See the Python 3.9 Installation instructions for both of those dependencies.
Installation
Using the macOS terminal, run the following command:
$ brew install mysql mysqlworkbench
When the above command completes, you will need to prepare the MySQL Service with the command:
$ brew services restart mysql
MySQL Configuration
We need to do some initial configuration to get MySQL ready for use. Luckily, we have a script from the installation that can help us with this. Run the following command to start configuration:
$ mysql_secure_installation
The first screen will look like this:
Securing the MySQL server deployment.

Connecting to MySQL using a blank password.

VALIDATE PASSWORD COMPONENT can be used to test passwords
and improve security. It checks the strength of password
and allows the users to set only those passwords which are
secure enough. Would you like to setup VALIDATE PASSWORD component?

Press y|Y for Yes, any other key for No:
You can type in y or Y to agree.
The next screen will look like this:
There are three levels of password validation policy:

LOW    Length >= 8
MEDIUM Length >= 8, numeric, mixed case, and special characters
STRONG Length >= 8, numeric, mixed case, special characters and dictionary file

Please enter 0 = LOW, 1 = MEDIUM and 2 = STRONG:
You are only developing locally, so 0 (the LOW setting) should be fine. If you plan to use a more advanced password do NOT use a question mark for the special character. It will interfere with entering your password on the command line.
As you type in your password remember that it will NOT show up while you type, so you have to use the force. Make sure to write down your password somewhere where you will remember it. You WILL need it.
When you are done with your password, the next prompt is:
By default, a MySQL installation has an anonymous user,
allowing anyone to log into MySQL without having to have
a user account created for them. This is intended only for
testing, and to make the installation go a bit smoother.
You should remove them before moving into a production
environment.

Remove anonymous users? (Press y|Y for Yes, any other key for No) :
We will only be developing locally so this shouldn’t matter. I used y or Y to remove my anonymous users.
The next screen is concerned with securing the root (administrator account) and looks like this:
Normally, root should only be allowed to connect from
'localhost'. This ensures that someone cannot guess at
the root password from the network.

Disallow root login remotely? (Press y|Y for Yes, any other key for No) :
Yes to this. You don’t someone to be able to use root with remote root access.
The next screen will ask about a default “test” database installed with MySQL:
By default, MySQL comes with a database named 'test' that
anyone can access. This is also intended only for testing,
and should be removed before moving into a production
environment.


Remove test database and access to it? (Press y|Y for Yes, any other key for No)
Choose yes. You can remove the test database since we will use other databases.
Lastly we need to reset the system tables for MySQL that have all the good changes we just made:
Reloading the privilege tables will ensure that all changes
made so far will take effect immediately.

Reload privilege tables now? (Press y|Y for Yes, any other key for No) :
Choose yes to reload the privilege table.
Setup your MySQL user account
I choose to setup a mysql account that matches my username. This has two advantages:
- We are authenticating and interacting with the database system as a non-root user
- When we want to access mysql from the command line we have less to type
Start by running the command mysql from your terminal.
This will show you the account name that was used to attempt access. For me it says Access denied for user 'mionescu'@'localhost'. You will see your account name instead.
I’m going to make a user account named mionescu that matches that account name I was just shown that can access the mysql service from localhost (my local computer).
First we are going to use the root account that we previously setup. We will use this login to setup our new account.
$ mysql -u root -p
The -u option means username, and the -p option means that we want to enter a password. After running the command it will prompt you for a password. Make sure to use the password that you wrote down earlier for the root account. If your login is successful you should see a mysql prompt similar to the following:
Welcome to the MySQL monitor.  Commands end with ; or \g.
Your MySQL connection id is 20
Server version: 8.0.27 Homebrew

Copyright (c) 2000, 2021, Oracle and/or its affiliates.

Oracle is a registered trademark of Oracle Corporation and/or its
affiliates. Other names may be trademarks of their respective
owners.

Type 'help;' or '\h' for help. Type '\c' to clear the current input statement.

mysql>
From this prompt we have access to MySQL and can setup users, databases, and run SQL code.
NOTE: The mysql> in the following commands indicates that command is run from the mysql prompt and not the normal terminal prompt that I traditionally represent with $.
To create a new user to match our current account, we can run the command:
mysql> CREATE USER 'mionescu'@'localhost' IDENTIFIED BY 'enter your password here';
You must replace mionescu with your username and the enter your password here with a password you will remember (write it down if necessary).
Now we assign our new user access permissions:
mysql> GRANT ALL PRIVILEGES ON * . * TO 'mionescu'@'localhost';
Once again, you will put your username in place of my mionescu username. This will give you all permissions to all the databases in your MySQL instance.
When you add or change users, you have to refresh the MySQL permissions table.
mysql> FLUSH PRIVILEGES;
When that command finishes you can quit the MySQL prompt with the following command:
mysql> exit
You can now use your terminal to test out your new login with the command:
$ mysql -p
You will be prompted to enter the password, and if everything goes well you will see the mysql> prompt on the command line again.