CS 100

Scientific Computing
Activity 25 - More Pictures 🎨
Complete the setup to install the cImage module and read some key differences based on the latest updates to the module.
Create a file called img-processing.py and save it to your cs100/ch6 folder. Save the following image to the same location with the name bird.jpg.
-
Take the code shown earlier (below for reference). Add it to the bottom of your file and run it. Click anywhere on the first image (not on the ‘X’!!) to close it. You should see the new window pop up immediately. Note that it might take a few moments for the new image to display as it is processing the entire image.
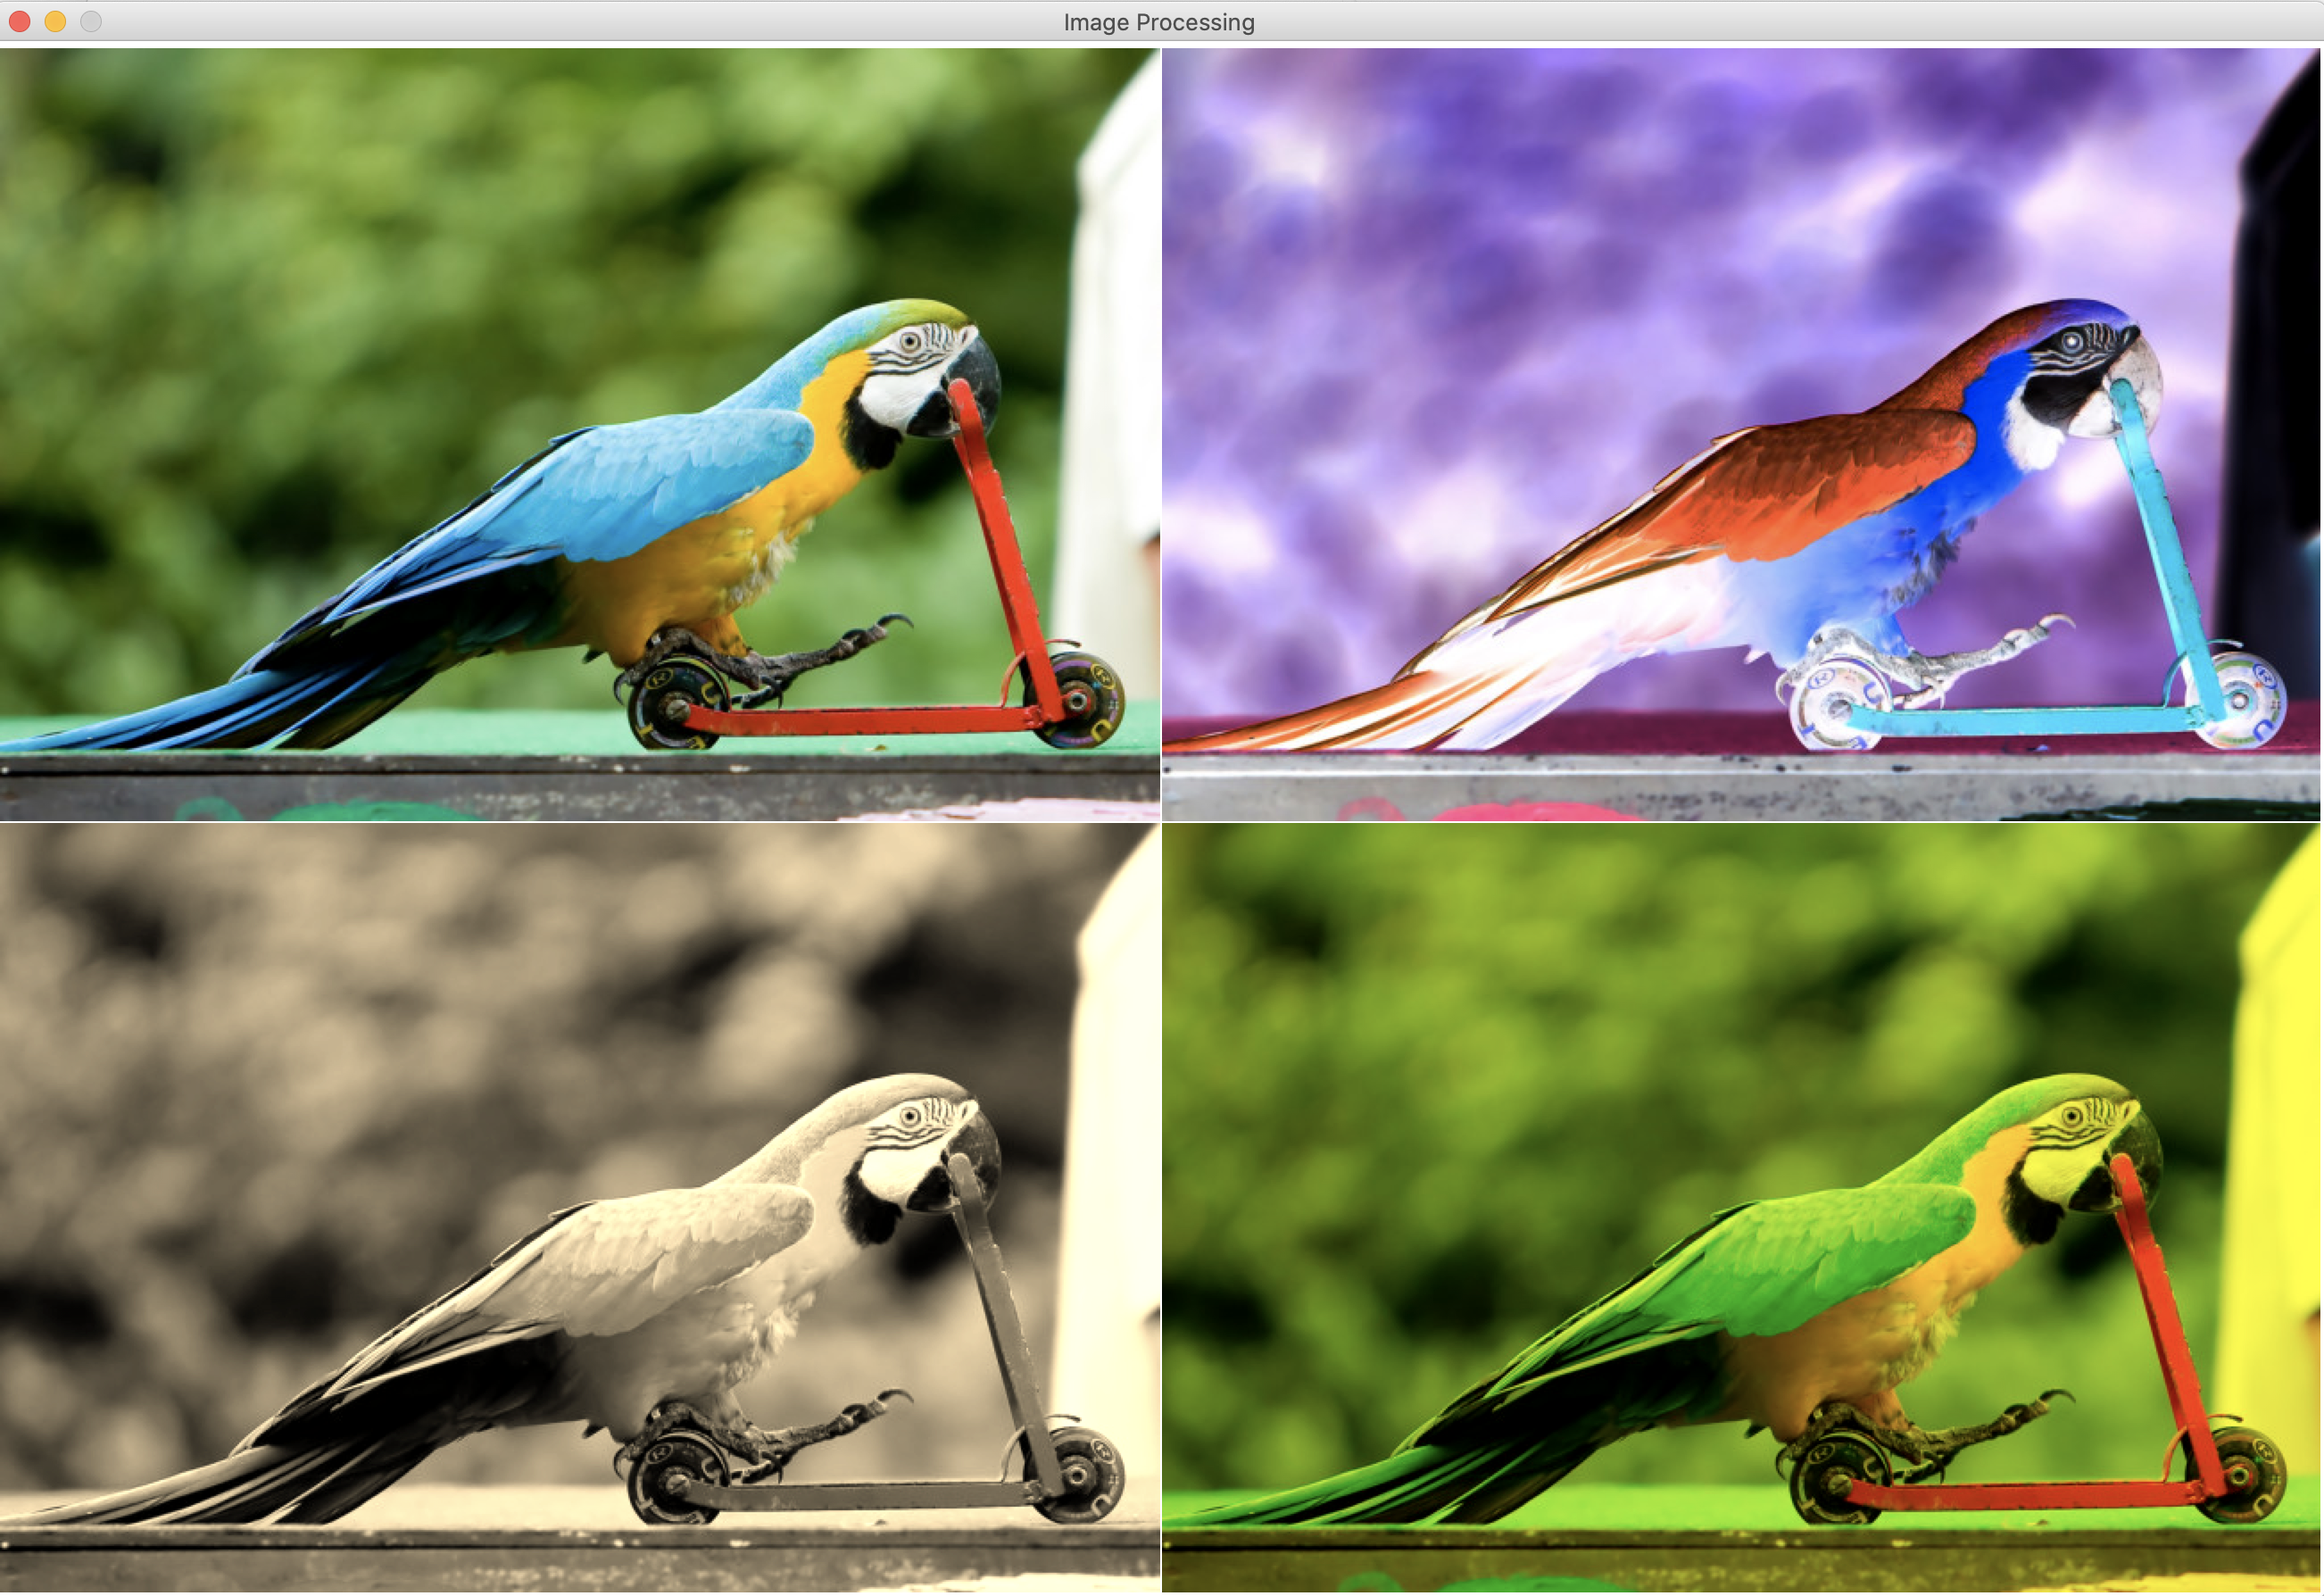
from image import * # takes a pixel and negates it def negativePixel(oldPixel): newRed = 255 - oldPixel.getRed() newGreen = 255 - oldPixel.getGreen() newBlue = 255 - oldPixel.getBlue() return Pixel(newRed, newGreen, newBlue) # take a pixel and make it sepia def sepiaPixel(oldPixel): # FIX return oldPixel # take a pixel and remove all red from it def noBluePixel(oldPixel): # FIX return oldPixel # go through each pixel using the provided rgbFunction to modify it def pixelMapper(oldImage, rgbFunction): width = oldImage.getWidth() height = oldImage.getHeight() newImg = EmptyImage(width, height) for row in range(height): for col in range(width): originalPixel = oldImage.getPixel(col, row) newPixel = rgbFunction(originalPixel) newImg.setPixel(col, row, newPixel) return newImg # open an image to draw it on the screen oldImage = FileImage("bird.jpg") w = oldImage.getWidth() h = oldImage.getHeight() myImageWindow = ImageWin(w*2, h*2, "Image Processing") oldImage.draw(myImageWindow) # process image and display result on other half of the screen print("Processing image....") newImage = pixelMapper(oldImage, negativePixel) # using the negativePixel function! newImage.setPosition(oldImage.getWidth() + 1, 0) newImage.draw(myImageWindow) newImage2 = pixelMapper(oldImage, sepiaPixel) newImage2.setPosition(0, oldImage.getHeight() + 1) newImage2.draw(myImageWindow) newImage3 = pixelMapper(oldImage, noBluePixel) newImage3.setPosition(oldImage.getWidth() + 1, oldImage.getHeight() + 1) newImage3.draw(myImageWindow) print("Done!") myImageWindow.exitOnClick() - Implement the function
sepiaPixel(oldPixel). Sepia tone is a brownish color that was used for photographs in times past. Complete the function to convert a pixel to a sepia tone. Note that values must be integers between 0 and 255. The formula is as follows:- newR = (R * 0.393) + (G * 0.769) + (B * 0.189)
- newG = (R * 0.349) + (G * 0.686) + (B * 0.168)
- newB = (R * 0.272) + (G * 0.534) + (B * 0.131)
- Implement the function
noBluePixel(oldPixel)to remove the blue from a pixel. It should set the blue to 0 and preserve the other colors.
When you are finished, your program should produce the following output:

If you finish early
-
Implement a new RGB function of your choice. Some ideas: remove the red, remove the green, remove 2 colors, make it gray scale, enhance the intensity of all or some colors. Modify the first pixelMapper call which uses the
negatePixelfunction so that it uses your new function instead. -
Try all of the above with a new image of your choice!
-
Work on your final project with your group.
How to submit
Submit your working img-processing.py to Moodle AND INCLUDE THE IMAGE YOU USED.