Excercise 01: Hello, CS110!
This exercise is designed to introduce you to using:
- git
- GitHub/GitHub Classroom
- compiling and running a C program.
Course Setup
You will need to complete the course setup instructions before you can proceed with this assignement.
GitHub Classroom
We will have to acquire code repositories from git in order to run example code or work on coding assignments. Assignments distributed by GitHub Classroom a link that you will use to accept and access an assignment. Once you have accepted the assignment, you can clone the repository from GitHub. It is important to note that the first time you use GitHub Classroom you will need to associate your GitHub account with your name in the class roster. BE CAREFUL WHEN YOU DO THIS AND PICK THE CORRECT NAME! If your name is NOT in the list, please email me and I will add you! You will only need to associate your GitHub account with your name once for the first assignment (which conveniently will be this one). When you accept the repository, you’ll get an email from GitHub with a link to the repo.
To find the GitHub Classroom link, visit the CS110 Moodle Classroom page and view the Exercises tab.
Create a CS110 directory for all your work
It is recommended to create a folder named cs110 to hold all your work. You can do this using Finder on Mac or by using the command explorer.exe . from the Windows WSL terminal window to open Windows Explorer. On Mac you might want to put your folder on your Desktop or Documents folder for convenience. On Windows adding the cs110 in your home directory (where you might see another folder called .landscape or some files that start with .bash) will be most convenient.
Cloning a Git Repository
A Git repository stores the current version of a project’s files, along with the history of changes to the repository. When you clone a repository from a server, you get a local copy of the repository on your computer.
Open up a command line terminal. In macOS, do this by opening the Terminal application. If you are using the Windows Subsystem for Linux (WSL), open your WSL Ubuntu app.
Now you need to navigate to the directory that you created for the class. You can do this with the command cd (which stands for change directory). On macOS you will want to do this:
$ cd Documents/cs110
If you are on Windows using WSL:
$ cd cs110
When using the command line you are always in a working directory. You have now changed your working directory to be your class directory. You can see what your working directory is at any time by running the command pwd (print working directory). When you typed cd you told the terminal that you wanted to change directory and provided a path to the cs110 folder.
Now you can clone the repository for this activity. The GitHub link for your assignment will open up the repository page which has a green button that says <> Code on it. If you click that button it will show the url for your repository and you can click the button to the right of the url to copy the text.
Once you have the url copied, run the following command (without the brackets []):
$ git clone [PASTED URL HERE]
If you setup gh and git correctly, you shouldn’t be prompted for a password and the assignment will begin copying. If all goes according to plan you should see output like this (the text itself may differ some):
Cloning into 'e01-hello_world'...
remote: Counting objects: 3, done.
remote: Compressing objects: 100% (2/2), done.
remote: Total 3 (delta 0), reused 0 (delta 0)
Receiving objects: 100% (3/3), done.
Checking connectivity... done.
The command ls lists files and directories. If you run ls now you should see a single directory named after your repository.
For this class you will run commands on the command line to clone assignments, compile and run programs, and submit assignments. To start, open up the command line interface (open the Terminal application in macOS or open Ubuntu in Windows).
Navigating into the Cloned Directory
Run the following command to change your working directory to the directory you just cloned:
$ cd [NAME OF ASSIGNMENT DIRECTORY]
Now run ls and you should see a file named hello.c.
Note that you can see this file in macOS’s Finder or in Windows Explorer too (for windows you will want to use the explorer.exe . to help). Open up the directory that you created and you should see the assignment folder, and inside there you should see hello.c.
Editing the File
Launch Visual Studio Code and open hello.c.
Note that hello.c is an empty file. Enter the following into the editor. I recommend typing it out instead of copying and pasting, so that you can start to get C under your fingers:
#include <stdio.h>

int main() {
    printf("hello world!\n");

    return 0;
}
We will talk about what everything in this program means soon, for now you just want to make sure you can edit, compile, and run this program.
Compiling the Program
C programs must be compiled. Compiling a program turns it into machine language that is not easily read by humans but can be efficiently executed by a computer.
Compilation is not needed with interpreted languages like Python, which can run human readable files directly. This is a trade-off. After making a change to a Python program it can be run again immediately. After making a change to a C program it must be re-compiled before it can be run, but it will likely run more quickly than a Python program that was written to do the same thing.
Compile the hello world program using gcc like so:
gcc hello.c
If your program compiled without any errors you should see no output from gcc.
Running the Program
Now that the program is compiled, you can run it. By default gcc names the compiled program a.out. Type ls and you should now see 2 files: a.out and hello.c.
You can run a.out like this:
$./a.out
You should see the text hello world! printed in the terminal. Congratulations, you have now compiled and run a program in C!
Naming Your Compiled Program
a.out is not a very descriptive name for a program. You can tell gcc to name the file something else by using the argument -o, followed by the name you want to give the executable. You still need to pass gcc the name of the C file to compile too. So to compile hello.c and name the executable file hello, you would run the following:
$ gcc hello.c -o hello
The -o hello portion of the command can also come before the file to compile, like this:
$ gcc -o hello hello.c
Either way, you can now run the program by running ./hello.
Deleting Files
Now that our program is named something better, we don’t need the a.out file anymore. You can delete it with the rm command:
$ rm a.out
BE VERY CAREFUL WITH THIS COMMAND!! rm does not send files to the trash or recycle bin, it deletes them permanently.
Re-running Commands
You can access commands from the command line history by using the up and down arrows. Try re-compiling the program by pressing the up arrow until you see the gcc command that you last used to compile the program, and then press enter. Then use the up arrow to get back to and re-run the ./hello command.
Committing your Changes
You have edited hello.c, now you need to add your changes to the Git repository. To do this you must commit your change.
You can see what the current status of your Git repository is by running git status. Your output should look something like this:
On branch main
Your branch is up-to-date with 'origin/main'.
Changes not staged for commit:
  (use "git add <file>..." to update what will be committed)
  (use "git checkout -- <file>..." to discard changes in working directory)

    modified:   hello.c

Untracked files:
  (use "git add <file>..." to include in what will be committed)

    hello

no changes added to commit (use "git add" and/or "git commit -a")
Git notices 2 things: the file hello.c has changed since the last commit, and there is a new file called hello that is not tracked by Git.
We want the change to the source file hello.c to be committed to the repository but we do not want to commit the executable file hello to the repository. In general you do not want to add executable files to a git repository because they will not work on every computer, they take up more space, and they can be re-compiled on a new computer if need be.
We will look later at how we can ensure that we never commit executable files at a later time.
We need to stage the change so that it will be included when we commit. To stage a file to be committed, use git add with the name of the file, like this:
git add hello.c
Now run git status again and you should see this:
On branch main
Your branch is up-to-date with 'origin/main'.
Changes to be committed:
  (use "git reset HEAD <file>..." to unstage)

    modified:   hello.c

Untracked files:
  (use "git add <file>..." to include in what will be committed)

    hello
where the modification is now green. We are now ready to commit!
Run the following to commit:
$ git commit -m "Modify hello.c"
The commit message, which follows -m, must be in quotes. If you run git commit without the message you will be taken to a command line text editor. We configured git to use the text editor nano by default during the environement setup, so you call follow in on screen instructions for how to edit the file. NOTE that the ^ symbol in the nano usage instructions refer to the CTRL key on your keyboard. For example, ^+X to exit will be activated by pressing Ctrl along with the X key on your keyboard. As long as you use the -m option with git commit you’ll never need to worry about this for our class.
Be sure to practice good commit style when writing your commits and use a declarative present tense. For example:
- Add new file xxxxx.c
- Fix bug xxxxxx
- Edit function xxxxxxx
Once you have committed your change, run git log. This will show the history of commits. You should see the initial commit that created the repository, and your commit. To exit the log, you will need to press the q key to quit.
Submitting Your Changes
Now you can push your changes to GitHub. Run the following:
$ git push
You should see something like this (again, the text may be different):
Counting objects: 3, done.
Delta compression using up to 4 threads.
Compressing objects: 100% (2/2), done.
Writing objects: 100% (3/3), 269 bytes | 0 bytes/s, done.
Total 3 (delta 1), reused 0 (delta 0)
To dguarnera@gitkeeper.wooster.edu/home/dguarnera/dguarnera/cs110/e01-hello_world.git
  a811a69..ef01028  master -> master
You may see a warning about the default push behavior not being specified, which you can ignore.
It is important to note that if you don’t push your commits they will never get submitted to the server for grading or evaluation. Remember that once you are working on your project, the work flow is:
- add changed files or new files
- commit changed files or new files you’ve added
- push the commits to GitHub
Submission Testing
To help you with your projects, most of our assignments provide a testing suit to evaluate the correctness of the code you have written under specific circumstances. It is possible to run these tests locally on your computer, but for now, we will discuss the auto testing feature on GitHub.
Once you push code to GitHub a testing script will start running on your submission. The results from the tests can take a few minutes to complete. You can view the results of your submission from the GitHub repository link that you received from GitHub via email when you accepted the assignment.
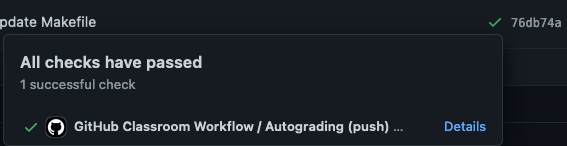
When you view your assignment repository on GitHub, you will see a portion of the screen that shows the number of commits you have made, the date of the latest commit, some weird alpha-numeric text, and a green check, red X, or orange circle.

These indicate the status of the testing run against your program submission.
- green check - all tests have passed
- red X - at least one test has failed
- orange circle - the tests have not finished runnning yet
If you click the check, x, or circle symbol, it will pop up a little window with additional details about the testing.
If you click on the details link, it will take you to the screen with all the information about the testing for your current submission. While there are multiple steps for the testing process, the autograding action is the only one of interest to you. If you click and expand that option, you will see the result of each test run.

The testing program stops running tests after the first failed test. This means that you should read the output message from the incorrect test and compare the results in the files it mentions.
In the case of this assignment, our code currently does not pass the testing. Read the testing message and see what we need to change in our code to get the write result. Add, commit, and push your changes to GitHub until you pass the test.
HINT our hello world! output is wrong.
IMPORTANT: When checking the output provided by your program, the text must be EXACT. This means you may fail a test due to formatting, typos, or other things in your output. Be dilligent of this.
Grading - 10 points
- 10 points - the test passes